Showing posts with label Ecology. Show all posts

Wednesday, May 17, 2023

Get Out of the Classroom and onto the Trail!


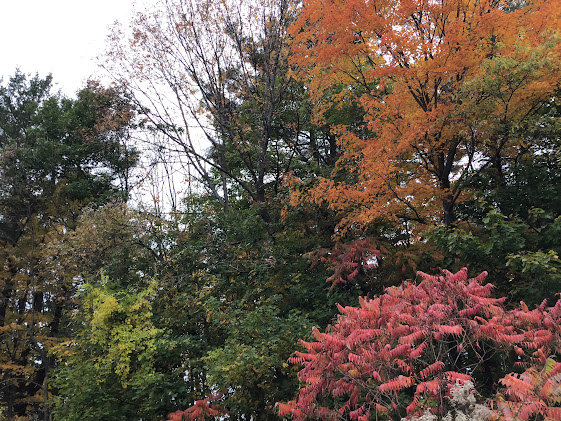
As the weather gets nicer, and students begin to feel a bit trapped being indoors, it can be nice to take a break for a day and go outside on a nature walk. 

When I taught at the Museum School in San Diego, we were fortunate to have a trail within walking distance. We also took field trips to local nature preserves. It required some extra effort but was always well worth it!

A nature walk can provide a brief pause from standards-based academics. The natural learning and unexpected discoveries that take place have value in themselves, as does the connection students can form with the natural world. This connection can plant seeds of a lifelong curiosity about ecosystems.
Some students were lucky to catch a glimpse of a gray fox!

Nature walks can also be used to highlight concepts being explored in class. Erosion, natural selection, invasive species, human impact, and biotic vs. abiotic factors are examples of topics that can be reinforced while on the trail. 

At times I used a walk as a stand-alone activity. Other times I used it as a step in guiding the class to generate a question for a field study. In both cases, I prepared students by teaching them about the plants they might see on the trail, and during the walk I asked that they complete a simple observations sheet to encourage them to closely study their surroundings.

One of the most valuable aspects of getting students outdoors and on the trail is to allow them a little unstructured time in nature. This provides us all with an opportunity to get to know one another a little better.


If you are interested in another opportunity for outdoor learning, follow this link to my blogpost about a citizen science project on pollinators:

Get Outdoors with Citizen Science! The Great Sunflower Project

I hope that you enjoyed this blogpost. If you are interested in joining my email list, please follow this link:

SUBSCRIBE TO EMAIL LIST


Wednesday, March 15, 2023

Model Photosynthesis and Respiration with Berries


Students can model photosynthesis and respiration by making molecules out of strawberries, blueberries, grapes, and toothpicks. I wanted to create a healthier option to the gumdrops that are often used to model molecules, so I experimented with berries, and it worked nicely! 

You can use this activity when teaching Next Generation Science Standard (NGSS) MS-LS1-6: Construct a scientific explanation based on evidence for the role of photosynthesis in the cycling of matter and flow of energy into and out of organisms. It can also be used to teach MS-LS2-3: Develop a model to describe the cycling of matter and flow of energy among living and nonliving parts of an ecosystem.


Students should prepare for this activity by first creating structural formulas for the reactants and products of photosynthesis and respiration. In a previous class, I provided a handout for students to draw structural formulas of all reactants and products of each process, referring students to this video (start at 6:10 for photosynthesis and 5:33 for respiration):


Chemistry Tutorial: Chemical Equations & Photosynthesis


As students draw their structural formulas, they begin to see that photosynthesis and respiration are opposite processes. 


On the day of the activity, students get directions for creating their berry models. Because carbon atoms are the largest of these atoms, I asked students to represent them using strawberries, the largest berries. The smallest atom, hydrogen, is represented by the smallest berry. Toothpicks are used as bonds.


Strawberries = Carbon Atoms

Grapes = Oxygen Atoms

Blueberries = Hydrogen Atoms


With the structural formulas they created previously in hand, students begin by creating molecules of water and carbon dioxide, the reactants of photosynthesis. You could allow students to work with a partner though you may want students to handle their own berries to prevent the spread of germs. The photo below shows students who successfully completed this first step (one water molecule not shown in the frame).

After building the reactants of photosynthesis, the next step is to model photosynthesis by breaking the bonds in water and carbon dioxide molecules and rearranging the atoms to form glucose, the product of photosynthesis.


The last step is to model respiration by breaking apart the glucose molecule to form the products of respiration, carbon dioxide and water. Students end with the same molecules they started with.


Once students have their hands-on work checked by a teacher and write about the relationship between photosynthesis and respiration, they can eat all the berries. One student told me afterward that she had never really “gotten photosynthesis and respiration” before but understood it now!


If you are interested in another activity that involves playing around with food in the name of science, follow this link to my previous blogpost on making models of cells using pasta and toppings:


Edible Cell Model Made of Pasta


I hope that you enjoyed this blogpost and found it valuable. If you are interested in joining my email list, please follow this link:


                                SUBSCRIBE TO EMAIL LIST


Thursday, December 15, 2022

Teaching Resources from the California Academy of Sciences


The online resources offered by the California Academy of Sciences have been valuable to me as a science teacher. Recently I took a trip to San Francisco and visited the museum with my family. We really enjoyed the exhibits, and it seemed like a wonderful place to bring students on a field trip. If you live in the Bay Area or are ever visiting, it's worth a trip!


The California Academy of Sciences is a sizable science museum that houses impressive exhibits on four floors. It's topped with a living roof covered in native plants that attract and feed local pollinators.


There were many exhibits in the museum that we enjoyed. Some of the highlights were the aquarium, the planetarium show, and a living rainforest exhibit. 

The aquarium presented marine ecosystems from around the world though we especially enjoyed viewing the large tank with kelp, sea anemones, and fish found on the California coast.


As we entered the rainforest exhibit, we immediately felt the increase in temperature and humidity. The exhibit is filled with tropical plants, and you can see butterflies fluttering close by.


I have a love of rocks and minerals and was impressed by their collection, which was beautiful to view. 


Tickets to the California Academy of Sciences can be a little pricey, but as of the writing of this blogpost, San Francisco school groups get free admission, and the ticket price is reduced for other school groups.

Before ever visiting the museum itself, I used multiple online teaching resources from the California Academy of Sciences with my middle school students. I always found the  resources, which include video simulations and short films, to be of a very high quality. 

One of my favorite resources is a short video simulation depicting a kelp forest food web that teaches students how sea otters, sea urchins, kelp, and other ocean life are connected to one another and to the sun. This video could be used to help teach standards related to ecology, particularly NGSS standard MS-LS2-3: Develop a model to describe the cycling of matter and flow of energy among living and nonliving parts of an ecosystem. Guiding questions to ask students are provided. Here is a link to the video:


Another video I like is a simulation of photosynthesis viewed from inside a leaf. This video is a good resource for teaching NGSS standard MS-LS1-6: Construct a scientific explanation based on evidence for the role of photosynthesis in the cycling of matter and flow of energy into and out of organisms. Here's a link to the video:


The California Academy of Sciences has multiple teacher resources that include lesson plans, videos, and short films available online at no cost. These resources along with information on field trips and professional development can be found here:


I hope that you enjoyed this blogpost and found it helpful. If you are interested in joining my email list, please follow this link:

                                SUBSCRIBE TO EMAIL LIST


Tuesday, November 15, 2022

It's Tide Pool Season in California!


As we get closer to winter, the low tides become especially low, so this is an excellent time for viewing ocean life in tide pools. It's a time of year I always look forward to! 

Tide pooling season begins in the fall and continues through the winter and into early spring. It is at these times when you can catch a negative tide during the daytime. If you want to plan a trip, it is helpful to first consult a tide chart like this one for San Diego:

Tide Chart for San Diego

A ranger at Cabrillo National Monument said that any tide at or below 0.7 feet is good for viewing sea life, and the lower the tide, the better.

A trip to the tide pools is always a favorite among students. It feels great to get out to the ocean, and there are always so many things to explore and discover.


California Sea Hare

California Sea Hare Eggs

Tide pooling is a nice activity to do with your family, too!


If you plan to explore to explore tide pools with a school group and live in the San Diego area, Cabrillo National Monument offers some great ranger-lead programs for K-12 students. Their programs are free, and many are aligned with the Next Generation Science Standards (NGSS). 


With middle school students, I have participated in the Science Sampler and the Climate Kids programs, both for grades 5 - 12. The Science Sampler program engages students in practicing data collection on populations of organisms living in tide pools, modeling the way in which biologists collect this data at Cabrillo National Monument. The Climate Kids program addresses the affects of climate change, specifically ocean acidification, on sea life. 

Another benefit of a ranger-lead experience is having an expert help you spot hard-to-find creatures such as nudibranchs, sea hares, and on rare occasions, an octopus.

Spanish Shawl Nudibranch

If you are interested in learning more about the science programs offered at Cabrillo National Monument, follow this link:

Cabrillo National Monument Science Programs

Whether you explore tide pools independently or with a ranger, here are some things you might like to have with you:

* Closed-toe shoes with good traction (old sneakers)

* Pants that can be rolled up and warm layers on your upper body

* Sun protection (hat, sunscreen)

* Towel(s)

* Change of socks, shoes, and clothing (just in case you slip in the water)

* A Ziplock bag for your cell phone, if you bring one (not advised for students)

When wading in the tide pools, keep your eyes out for big waves, and avoid turning your back to them. Walk between the rocks rather than stepping on them. If you step on rocks to avoid walking in the water, you could easily slip on algae and really get yourself wet!

I hope that you enjoyed this blogpost and found it helpful. If you are interested in joining my email list, please follow this link:


                                SUBSCRIBE TO EMAIL LIST


Tuesday, October 18, 2022

Why Do Leaves Change Color in the Fall?


Why do leaves change color in the fall? This is the question I posed to my ten-year-old daughter when we took a short trip to Maine this month. I gave her the assignment of doing some research on the topic and writing a response. When I read what she had written, I thought that she had done very well with her explanation. I told her that we should share it with others, who might enjoy learning from what she had written. She suggested I post it on my blog, so here it is! The following piece and the photo of foliage above were done by her.

The leaves change color in the fall because the leaves start producing less chlorophyll. If you are wondering, chlorophyll is a chemical that makes leaves green. Chlorophyll is responsible for photosynthesis, when plants take in water and carbon dioxide and use sunlight to make sugar to feed themselves. In the fall, there is less sunlight, which means less photosynthesis for the plants and less need for chlorophyll. When this happens, the trees prepare to go dormant in the winter. Without chlorophyll, the green leaves start turning into red, orange, yellow, and brown leaves. As the chlorophyll breaks down, the carotenoids, orange-yellow and brown pigments, and anthocyanin, red and purple pigments, are revealed and/or created. (Most anthocyanin is created in the fall.) That is why sometimes the leaves are not solid colors, but a mix of colors because the carotenoids and the anthocyanin are slowly being revealed and/or created while the chlorophyll breaks down.

I hope that you enjoyed reading my daughter's work and perhaps learned something, too!

If you are interested in other blogposts related to science topics we explored while on vacation, here are a couple of links:

Snow Science: Freezing and Melting Points the Same?!


I hope that you found this blog post valuable. If you are interested in joining my email list, please follow this link:


                                SUBSCRIBE TO EMAIL LIST


Wednesday, July 27, 2022

Summertime Science in the Garden: Pollination

Bumblebee visiting gayfeather flowers in my dad's garden in Maine

Summer is a great season to spend time in a garden, and you often receive a little science lesson in the process. I enjoy watching various pollinators at work as they visit flowers. One of my favorites is the bumblebee, which is able to access pollen unavailable to other pollinators. Its secret is buzzing at a specific frequency that causes the flower's anthers to open and release pollen. (To learn more about buzz pollination, see the link at the end of this post to a Science Friday video on this topic.)

I learned about the importance of pollinators the hard way one year when my zucchini plants produced lots of flowers but no zucchini! I discovered that zucchini and other squash flowers are monoecious, meaning they have separate male and female flowers on the same plant. They can't self-pollinate, like some perfect flowers do, but instead rely on pollinators for the flowers to develop into fruits, the zucchini. Pollinators carry pollen from the anthers of a male flower to the stigma of a female flower. You can see these flower parts in the photos below, taken in my plot in the Juniper-Front Community Garden in San Diego.

Male squash flower with pollen-covered anther in the center

Female flower with stigma in the center

Fellow gardeners suggested that I plant some flowers to attract pollinators, and this has been very helpful. I learned that humans can serve as pollinators, too! This is a fun activity to do with kids. To hand pollinate a zucchini or other squash flower, remove the petals from a male squash blossom, and rub its anthers on the stigma of a female flower. One male flower can be used to pollinate multiple female flowers. 

Female blossom- note ovary below petals

Three days later: ovary developing into fruit

Male flower- note absence of ovary below petals

Once the flower has been pollinated, the pollen forms a tube that travels from the stigma down through the style to fertilize the ovules at the base of the pistil, triggering the development of the zucchini fruit. I now use this trick to pollinate my zucchini and spaghetti squash flowers with great success! 

If you enjoy watching pollinators and think you might be interested in helping collect data on pollinators in your area, you can learn about a citizen science project called The Great Sunflower Project in this blog post:


To learn more about buzz pollination, check out this Science Friday video:


Thanks for reading my blog! If you are interested in joining my email list, please follow this link:


                                SUBSCRIBE TO EMAIL LIST


Thursday, April 21, 2022

Get Outdoors with Citizen Science! The Great Sunflower Project


I discovered a simple yet engaging project that gets students and families outside and allows them to participate in authentic scientific research. The Great Sunflower Project is a citizen science activity in which students and volunteers nationwide observe flowers and record information about the pollinators that visit them. The data that is collected is entered on the project's website and then compiled and used to create maps showing the abundance of pollinators in different areas across the United States.

Data collection for The Great Sunflower Project can happen whenever pollinators are active. Because April is Citizen Science Month, and Earth Day is in April, I chose to have students do this project to celebrate Earth Day. Everyone seems to enjoy getting outside in spring when the weather is getting warmer. 

To prepare students for the project, I created a Google slideshow with some photos of pollinators listed on The Great Sunflower Project data sheet. These included bumblebees, honey bees, and carpenter bees. As I shared the slideshow with the class, I pointed out specific traits of the pollinators that would help to identify them. After receiving this "training", students took a quiz in which they had to identify pollinators from photographs.

The minimum time for observing flowers required by The Great Sunflower Project is five minutes. When doing this project with my middle school students, I asked them to spend between five and fifteen minutes on data collection, depending on the dynamics of the class and how much time was available to us. This may seem like a very short period of time, but staying focused on observations can be very challenging! After seeing students struggle with this in the past, I decided to reinforce the importance and challenge of staying focused on the flowers during the observation time. If you try this with your own students or children, don't be surprised if a few begin to wander a bit from their posts or perhaps need gentle reminders to watch the flowers for pollinators.  

If you are interested in learning more about The Great Sunflower Project, here is a link to a short video and description of the project:


Here is a link to register:


Update: When my students tried to enter data in April, 2022, we noticed that the website was down for a couple of days. I don't know if this happens frequently or not. If you plan to do this project with your students or family, just be aware of this. Despite the delay, students were motivated to contribute their data to a nationwide project!


Thanks for reading my blog! If you are interested in joining my email list, please follow this link:


                                SUBSCRIBE TO EMAIL LIST